Versions Compared

Key

  • This line was added.
  • This line was removed.
  • Formatting was changed.

Overview

ēno interactive whiteboards provide cordless interactivity with a computer using the Bluetooth-enabled ēno stylus. While the computer is projected onto the ēno interactive whiteboard, use the stylus to:

  • enhance presentations by enabling interaction and collaboration

  • navigate through documents, presentations, or websites from the whiteboard

  • write, highlight, and erase notes

  • print and save your work

ēno interactive whiteboards are made from ceramicsteel so you can also use them with dry-erase markers and magnets as well as the stylus.

Instructional Technology staff are happy to train anyone on the use of the ēno interactive whiteboard.  During the session we will install the required software, pair the stylus with your computer and provide instruction on using the system. We invite anyone to request training on this system. Please contact Jedidiah Rex or Adam Dinnes to schedule a training session. 

Table of contents

Table of Contents
outlinetrue
indent30px

Image Removed

Pairing the ēno stylus with the ēno receiver:

The ēno receiver connects to your computer’s USB port and pairs the Bluetooth signal with the ēno stylus. You can pair up to three ēno styli to one ēno receiver.

  1. Power On your computer and assure that the ēno App version 3.0 or higher has already been installed. This software will be installed on your machine during the required training session..

  2. Connect the ēno receiver to a USB port on the your computer.

  3. Power On the ēno stylus by removing the cap.

  4. Wait for the stylus LED to blink green once every three seconds.

  5. Press and release the Pair button on the ēno receiver to pair the Bluetooth signal with the stylus.

    While the ēno receiver searches for the ēno stylus Bluetooth signal, a status message appears on the computer screen and the LED on the ēno receiver flashes green.

    • If pairing is not successful, a status message appears on the computer screen.

    • If pairing was not successful, you can try to resolve the problem by removing the ēno receiver from the USB port, waiting five seconds, and reinserting it before attempting the pairing process again.

    • If pairing was not successful, refer to the Stylus LED status and troubleshooting section on page five.

  6. After pairing is successful (within 30 seconds), the status message on the computer screen indicates that ēno is ready to use and the ēno receiver LED changes to a solid blue color.

"Image Description"

Image Removed

"Image Description"

Image Removed

Mouse control using the ēno stylus:

To use the stylus as your mouse for controlling the host computer from the whiteboard:

  • Tap the Mouse icon on the icon strip.

  • Or tap the File icon on the icon strip.

While using the stylus in Mouse mode:To click, tap once.
  • To double-click, tap twice rapidly. Be sure to tap twice without moving the stylus.

  • To type, tap the Keyboard icon for access to your computer operating system on- screen keyboard. Refer to “Using the on-screen keyboard” on page 27 of the full User Guide.

  • For a right-click (Windows) or control-click (Macintosh), tap and hold the stylus tip (without moving it) on the whiteboard for one second.

  • To open the folder on your computer where you last saved an ēno snapshot file, tap the File icon.

  • To pass the “back” or “forward” command to the active application, tap the Left or Right arrow icons.

  • To pass the undo or redo command to the active application, tap the Undo or Redo icon.
    "Image Description"Image Removed

    Overview


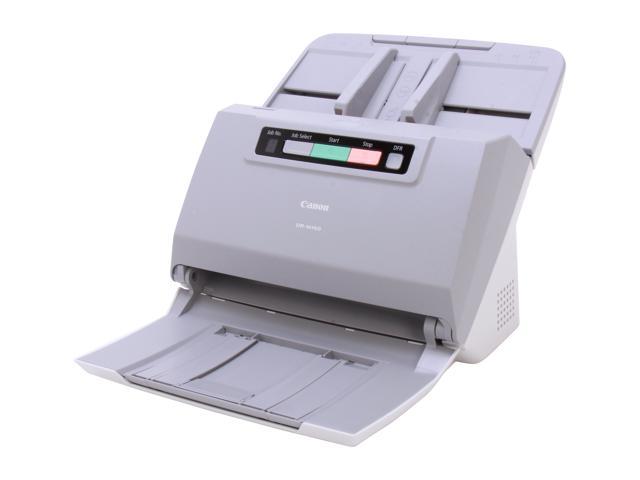
    The Canon imageFORMULA DR-M160 document scanner is a high-speed, full-color, sheet-feed style scanner located in the North Risers public computer area in Morse Library.  Please review the documentation below for operating instructions.


    Note

    Warning!

    Please make sure to save your file to an external device or personal cloud storage when you are done scanning, as files will be automatically deleted upon computer restart due to DeepFreeze.  Deleted files will not be recoverable.


    Canon imageFORMULA DR-M160 scannerImage Added


    Document Scanning


    Warning

    Warning!

    Before scanning a document, please be sure to remove and staples, paperclips, or sticky notes for best results.  These items will jam the document feeder and could potentially damage both the document and the scanner.

    To scan a document with the Canon DR-M160:

    1. Open DR-M160 CaptureOnTouch Image Addedsoftware using the shortcut on the desktop or from the Start menu.

    2. Insert your document into the scanner. Document should go face down, top-edge first to be oriented correctly for scanning.

    3. Using the software interface, choose the settings for your scan or choose from the available presets for what you would like to scan by utilizing the list on the left side of the window.

    4. Click the Scan button to start scanning.

    5. Once the scan is completed, files will automatically save to the Desktop, unless you select an alternative location.


    Info

    Accessibility Note:

    By default a PDF document is an image file without accessible text, meaning that anyone utilizing a screen reader will not be able to read your document. You can make your document accessible by using Adobe Acrobat Pro to recognize the text (OCR - optical character recognition) in the document after you have created a scan. Doing so makes the text searchable, select-able, and accessible to screen reader software. For more information on making your PDF scan accessible, please visit the article on Optical Character Recognition (OCR) in Adobe Acrobat Pro.


    "Image Description"

    Image Added


    Custom File


    If you choose the Custom File option you can select the settings you desire for the scan, opposed to using one of the preset scan options. To create a custom file:

    1. Open DR-M160 CaptureOnTouch Image Addedsoftware using the shortcut on the desktop or from the Start menu.

    2. Click the Scanner setting button.

    3. Click the Gear icon next to the “Use advanced settings dialog box” setting.

    4. Select the custom settings you desire.

    5. Click OK.

    6. Click the Output setting button.

    7. Click and select the file type you desire from the File type drop-down menu.

      • Some file types have multiple output options accessible via the Gear icon.

    8. Select where you would like the file to be saved.

    9. Click the Scan button to start scanning.

    10. Once the scan is completed, files will automatically save to the Desktop, unless you select an alternative location.


    Preset and Function

    Image Added